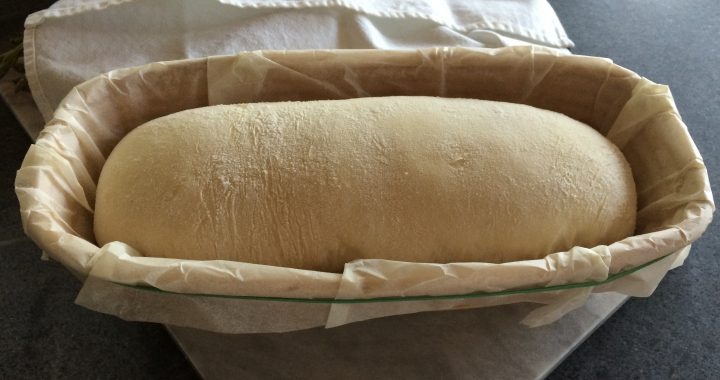
I don’t believe in doing anything the hard way… and I’ve got this bread down to as simple as bread can be. You may have to invest in a few tools you don’t have, but it’s worth it.
Prep time: 10 minutes
Total time: About 3 hours 30 minutes
The Tools
You’ll need a bread machine, a rectangular banetton (proofing basket), a rectangular Sassafras covered stone baker and some parchment paper. Before you start wondering about whether it’s worth the expense… assuming you already own a bread machine (who doesn’t), here’s how it breaks down. A 25-pound bag of bread flour is about $9 at a super-store. That’s 29 loaves of bread at about 35 cents a loaf. You’re paying somewhere between $2 and $3 to buy bread like this at your supermarket — twice that if you’re buying it at an artisan bread shop. You’ll recover the cost of your banetton and baker before you even get through your first bag of flour.
The Dough
Ingredients
3 cups (360 gm) bread flour
2 tsp active dry yeast
3/4 tsp salt
2 tsp sugar
1 cup water
2 tbs olive oil
Instructions
- Measure the flour, yeast, salt and sugar in a large bowl and mix well with a wire whisk.
- Measure the water and olive oil into the pan of your bread machine.
- Dump the flour mixture on top. Yes, I really am telling you to ignore the instructions that came with your bread machine.
- Set your machine for the basic dough setting and let it do all the work of mixing everything for you. This should take about 90-100 minutes to mix and do the first rise.
- While you’re waiting, line the banetton with parchment paper. It doesn’t have to be neat. Secure it with a big rubber band if you like.
The Second Rise
- Dump about 1/2 cup of flour on a cutting board and spread it around.
- Pour a dollop of olive oil into your palm and grease both hands like you’re applying lotion. If you want to make it even easier, don a pair of disposable plastic gloves. You can get a 3-pack of 500 gloves each at a super-store for about $8.
- Dump the dough onto the floured board.
- Shape the dough into a rough 9×12″ rectangle, pressing out the air bubbles as you go. Don’t futz with it too much. This should only take you 15-20 seconds.
- Fold it in thirds — lift one of the long edges up and lay it over the center, then do the same thing with the other edge. The dough rectangle should now be about 3″ wide.
- Transfer the dough to the banetton seam side down. Stretch or compress where you need to so you have a nice even layer of dough in the bottom of your basket.
- Cover with a cotton towel or dinner napkin and put it in a warm place to rise.
- Set a timer for 40 minutes.
The Baking
- When the timer goes off, place the stone baker in a cold oven.
- Turn the oven temperature to 425℉.
- Set a timer for 20 minutes.
- When the timer goes off, remove the extremely hot baker from the oven with your trusty mitts — I know you have them — and take the top off.
- Grab the edges of the parchment paper in your banetton and pick up the dough, parchment paper and all… and lower it into the baker. It may look like it’s too big to fit, but do it anyway.
- Place the cover on the baker and return it to the oven and bake for 35 minutes.
- Immediately transfer bread to a board to cool.
The Clean Up
None. The banetton was lined with parchment paper so it should still be clean as a whistle. If you managed to get a little flour on it, brush it off and put it away. The same goes for the baker. Over time, it’s going to have brown spots where it came into contact with olive oil and other moist food items. Ignore it. It’s meant to look like that after it has been heavily loved.
If you’re absolutely adamant about cleaning your tools, rinse them with warm water and let them dry thoroughly before you use them again.
The Satisfaction
I dare you to not cut it the moment it comes out of the oven. Use butter if you like, but it doesn’t need it. If your household is like mine, don’t be surprised if it’s half gone before dinner hits the plate.
